Hyundai Tucson: Timing System / Timing Chain

• Be careful not to damage the parts located under the vehicle (floor under cover, fuel filter, fuel tank and canister) when raising the vehicle using the lift.(Refer to General Information - "Lift and Support Points")
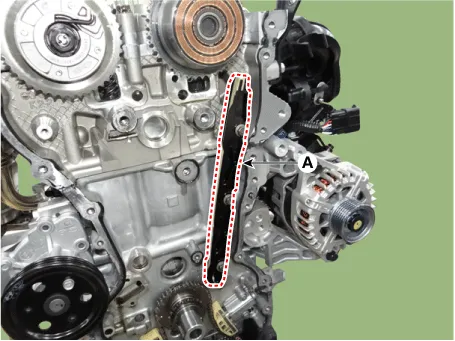
1.Set No.1 cylinder to TDC. Turn the crankshaft damper pulley clockwise and align its groovewith the timing mark "T" of the lower timing chain cover.

2.Remove the timing chain cover.(Refer to Timing System - "Timing Chain Cover")
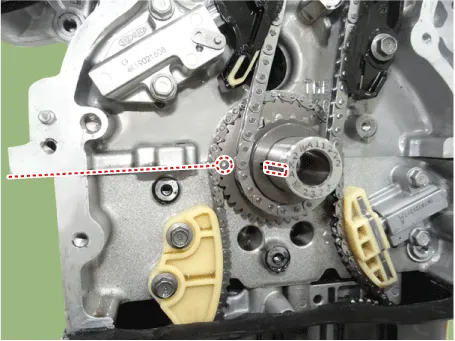
3.Make sure that the key (A) of crankshaft is aligned with the mounting surface of the lowercrankcase in a straight line. Check that the No.1 piston is positioned at the TDC.

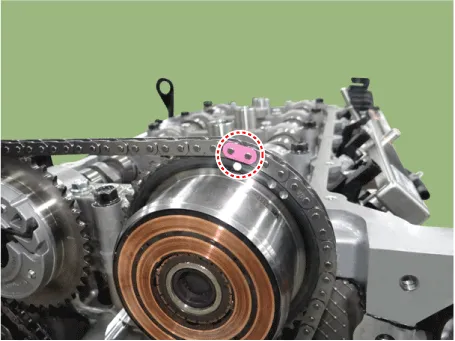
4.Check that the timing marks of the intake camshaft sprocket and the exhaust camshaftsprocket are in line.
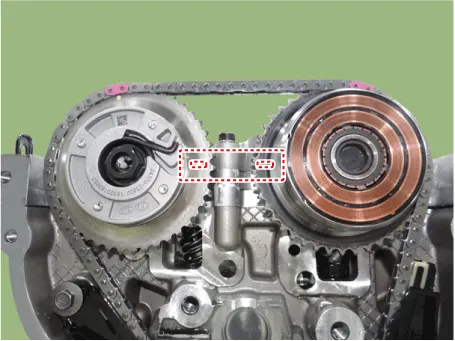

• If timing marks are not in line, turn the crankshaft clockwise one revolution (360°). (Do notrotate engine counterclockwise.)
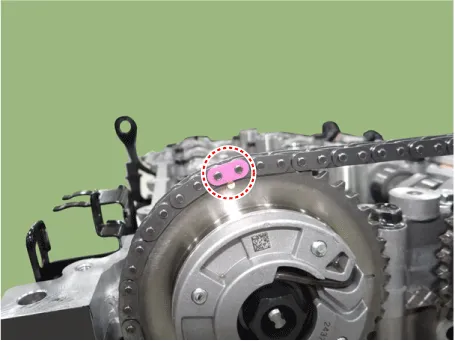
5.Release the ratchet by pulling the link of timing chain tensioner down using a thinscrewdriver. Compress the piston and then insert a stopper pin into the hole to fix the pistonand then remove the tensioner (A).
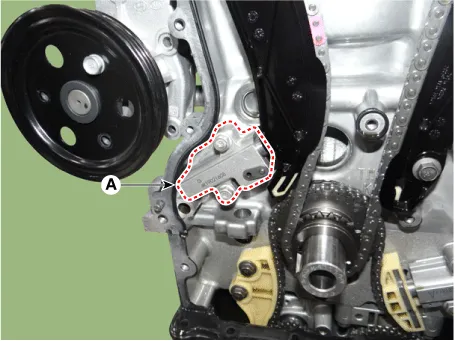

• Be careful not to pop out the piston when removing the tensioner.
6.Remove the timing chain tensioner arm (A).
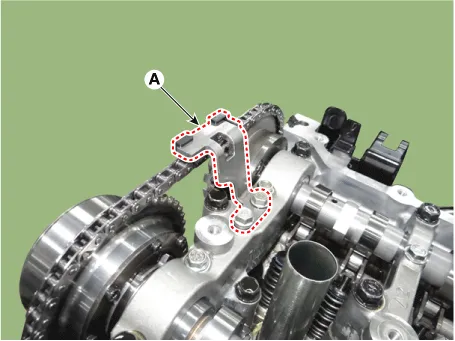
7.Remove the timing chain cam to cam guide (A).

8.Remove the timing chain (A).
9.Remove the timing chain guide (A).

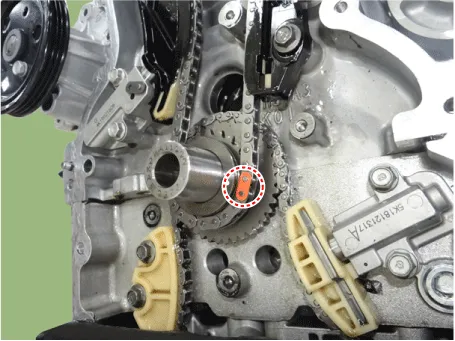
10.Remove the crankshaft chain sprocket (A) for the timing chain.

1.Check the CVVT sprocket, crankshaft sprocket teeth for abnormal wear, cracks or damage.Replace if necessary.
2.Inspect the chain tensioner arm and chain contacts of chain guide for abnormal wear, cracksor damage. Replace if necessary.
3.Check a contact surface of the chain tensioner arm and guide for abnormal wear, cracks ordamage. Replace if necessary.
4.Check that the chain tensioner piston slides smoothly and inspect whether the ratchetoperates normally. Replace if necessary.
1.Install the crankshaft chain sprocket (A) for the timing chain.
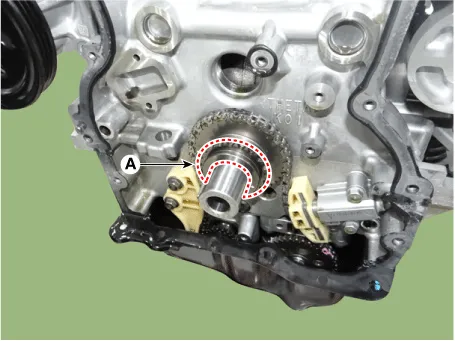
2.Make sure that the key (A) of crankshaft is aligned with the mouting surface of the lowercrankcase. Ensure that the TDC mark on the front of the intake/exhaust CVVT sprockets matchwith the top of the cylinder head.

3.Install the timing chain guide (A).
Tightening torque :9.8 - 11.7 N.m (1.0 - 1.2 kgf.m, 7.2 - 8.6 Ib.ft)
4.Install the timing chain (A).Crankshaft sprocket → Timing chain guide → Intake CVVT sprocket → Exhaust CVVT sprocket.


• When installing the timing chain, be sure that the timing mark
of each sprocket is matchedwith the timing mark (color link) of the
timing chain.
5.Install the timing chain cam to cam guide (A).
Tightening torque :9.8 - 11.7 N.m (1.0 - 1.2 kgf.m, 7.2 - 8.6 Ib.ft)
6.Install the timing chain tensioner arm (A)
Tightening torque :9.8 - 11.7 N.m (1.0 - 1.2 kgf.m, 7.2 - 8.6 Ib.ft)

7.Install the timing chain auto tensioner (A) and pull out pins.
Tightening torque :9.8 - 11.7 N.m (1.0 - 1.2 kgf.m, 7.2 - 8.6 Ib.ft)

8.Rotate the crankshaft 2 revolutions in clockwise direction. Ensure that the TDC mark on thefront of the intake/exhaust CVVT sprockets match with the top of the cylinder head.


• If timing marks are not in line, turn the crankshaft clockwise one revolution (360°). (Do notrotate engine counterclockwise.)
9.Install the timing chain cover.(Refer to Timing System - "Timing Chain Cover")
 Timing Chain Cover
- Removal
This working procedure does not require engine removal.
• Be careful not to damage the parts located under the vehicle
(floor under cover, fuel filter, fuel tank an ...

Other information:
Hyundai Tucson (NX4) 2022-2026 Service Manual: Components and Components Location
- Components
1. Front door trim2. Front door belt inside weatherstrip3. Front door quadrant inner cover4. Front door module5. Front door belt outside weatherstrip6. Front door frame molding7. Front door frame garnish8. Front door window glass run9. Front door side weatherstrip10. Front door bo ...
Hyundai Tucson (NX4) 2022-2026 Owner's Manual: Theft-alarm System
This system helps protect your vehicle
and valuables. The horn sounds and the
hazard warning lights blinks continuously
if any of the following occur:
- A door is opened without using the
remote key or smart key.
- The liftgate is opened without using
the remote key or smart key.
- Th ...
