Hyundai Tucson: ESC (Electronic Stability Control) System / Rear Wheel Speed Sensor
1. Rear wheel speed sensor
1. Rear wheel speed sensor

• Be careful not to damage the parts located under the vehicle (floor under cover, fuel filter, fuel tank and canister) when raising the vehicle using the lift.(Refer to General Information - "Lift and Support Points")
1.Loosen the wheel nuts slightly.Raise the vehicle, and make sure it is securely supported.
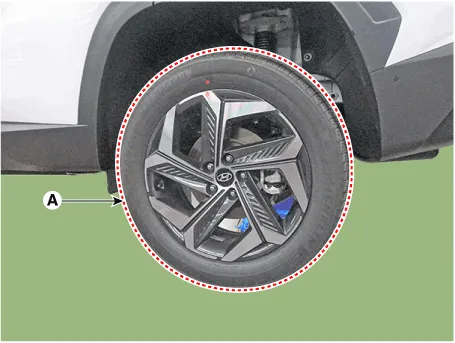
2.Remove the rear wheel and tire (A) from the rear hub.
Tightening torque :107.9 - 127.5 N.m (11.0 - 13.0 kgf.m, 79.6 - 94.0 lb-ft)

• Be careful not to damage the hub bolts when removing the front wheel and tire (A).

3.Remove the rear brake caliper.(Refer to Brake System - "Rear Disc Brake")
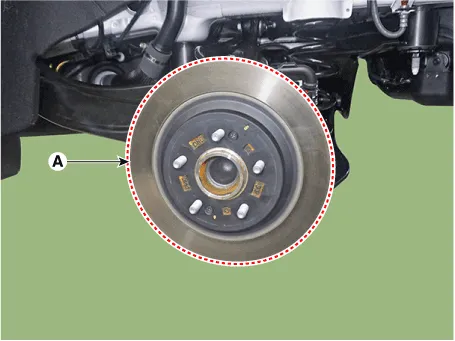
4.Loosen the screw and the remove the rear break disc.
Tightening torque :4.9 - 5.9 N.m (0.5 - 0.6 kgf.m, 3.6 - 4.3 lb-ft)
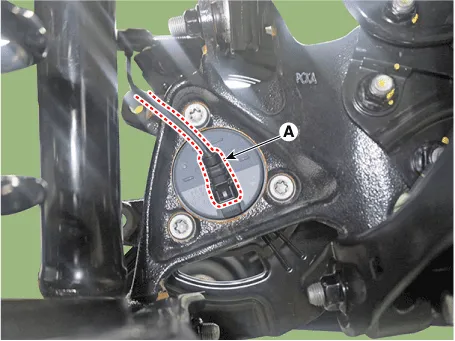
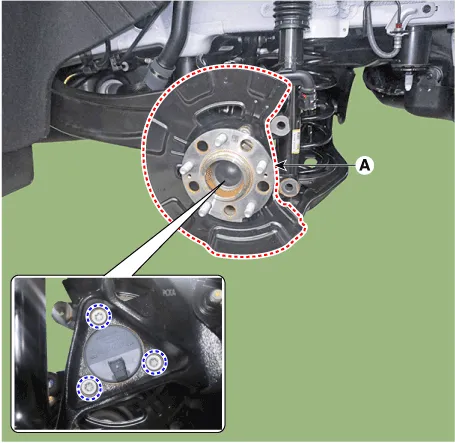
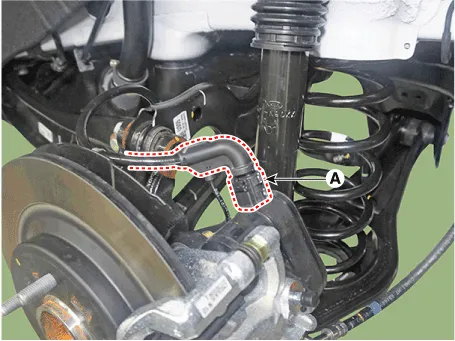
5.Disconnect the rear wheel speed sensor connector (A).
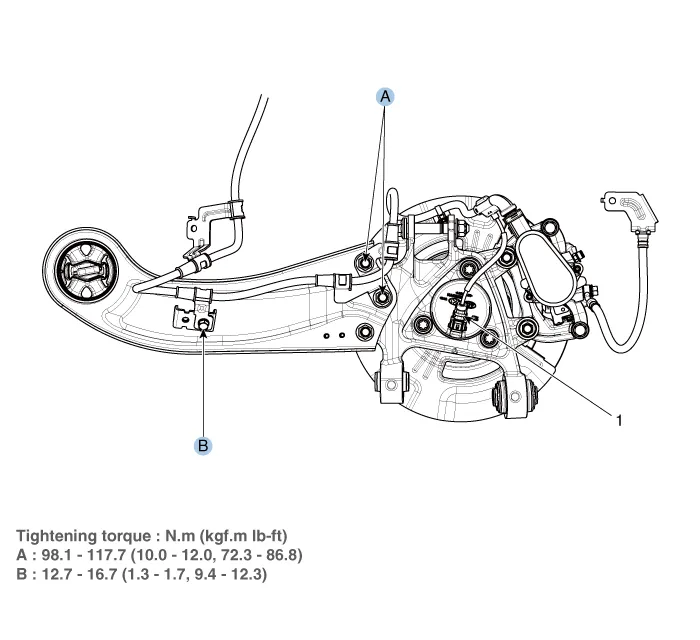
6.Loosen the bearing mounting bolts and then remove the hub bearing assembly & dust cover (A).
Tightening torque :98.1 - 117.7 N.m (10.0 - 12.0 kgf.m, 72.3 - 86.8 lb-ft)
1.Loosen the wheel nuts slightly.Raise the vehicle, and make sure it is securely supported.
2.Remove the rear wheel and tire (A) from the rear hub.
Tightening torque :107.9 - 127.5 N.m (11.0 - 13.0 kgf.m, 79.6 - 94.0 lb-ft)

• Be careful not to damage the hub bolts when removing the rear wheel and tire (A).
3.Remove the rear wheel guard.(Refer to Body - "Rear Wheel Guard")
4.Remove the rear wheel speed sensor cable braket bolt (A).
Tightening torque :19.6 - 29.4 N.m (2.0 - 3.0 kgf.m, 14.5 - 21.7 lb-ft)
5.Remove the luggage side trim.(Refer to Body - "Luggage Side Trim")
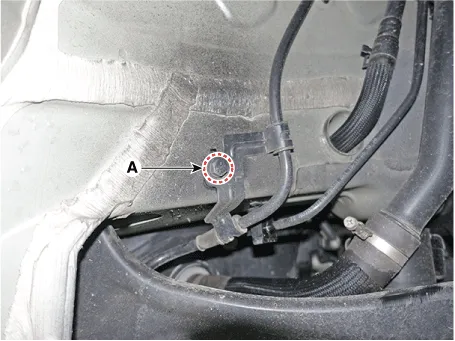
6.Disconnect the rear wheel speed sensor connector (A).
7.Disconnect the EPB actuator connetor (A).
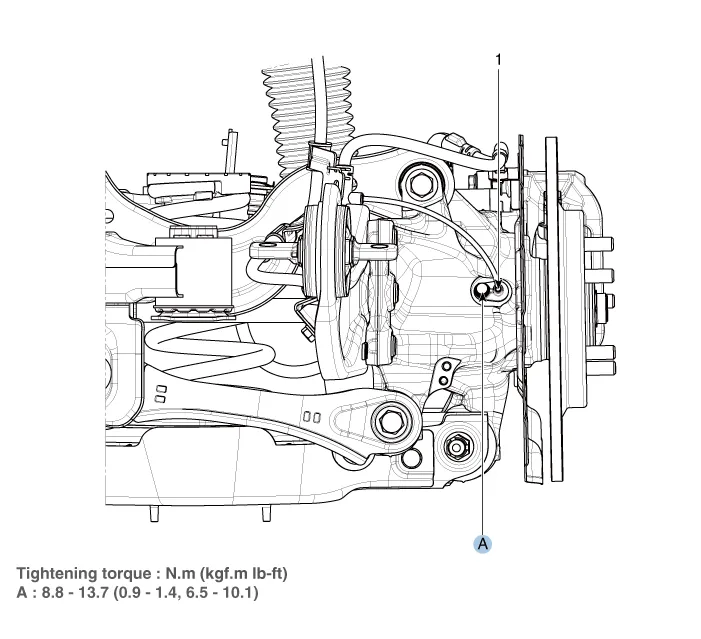
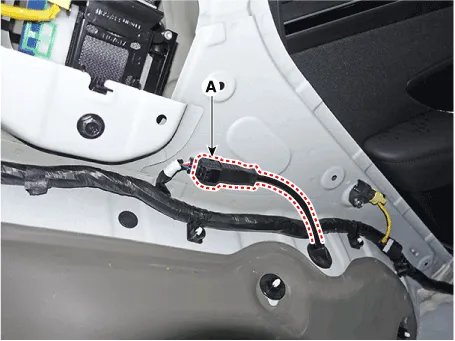
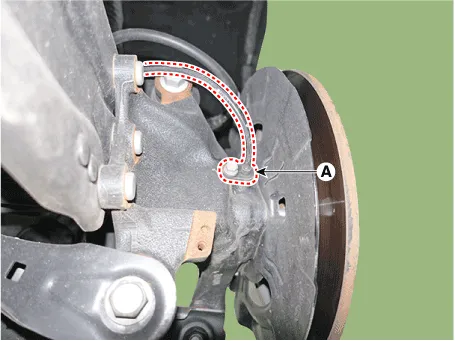
8.Remove the bolt and then disconnect the rear wheel speed sensor (A).
Tightening torque :8.8 - 13.7 N.m (0.9 - 1.4 kgf.m, 6.5 - 10.1 lb-ft)
1.Remove the rear wheel hub bearing assembly.(Refer to Driveshaft and Axle - "Rear Hub - Carrier")
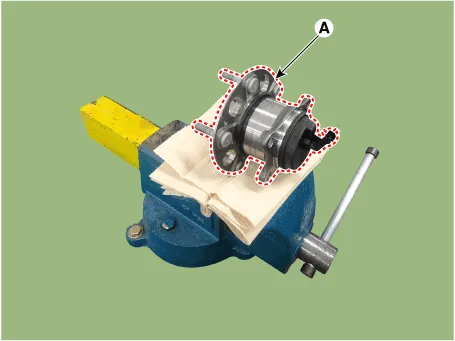
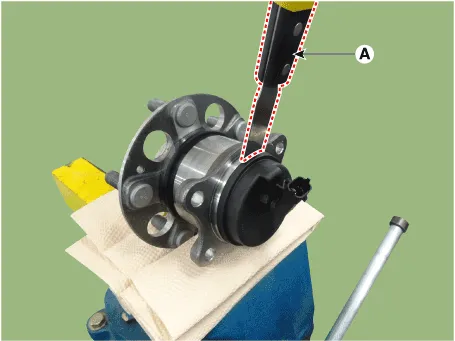
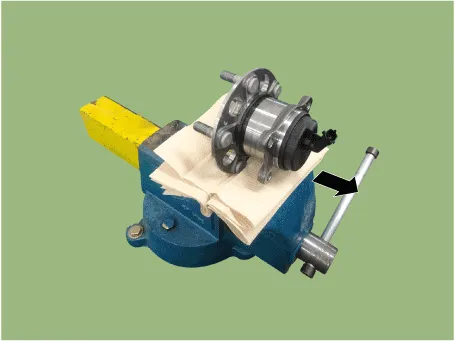
2.Fix the rear hub bearing assembly (A) on the vise.

• When fixing on the vise, use a cloth not to be damaged the hub bearing assembly.
• Be careful if excessive force for fixing on the vise may damage the hub bearing assembly.
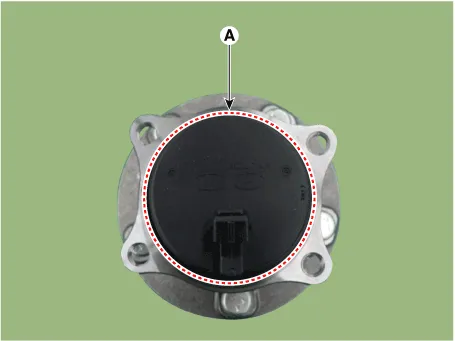
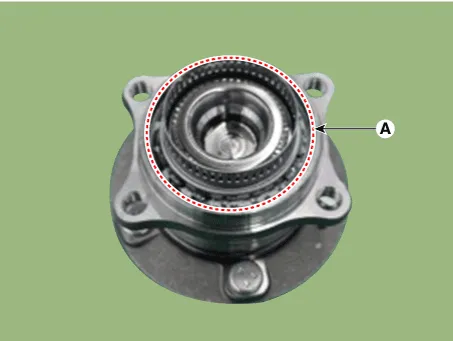
3.Check the direction of the sensor cap (A).
4.Remove the sensor cap by hammering on a gap between sensor cap and hub bearing assembly using a scraper (A).

• In order to widen the gap little by little, hammering around the bearing cap 10-20 times.
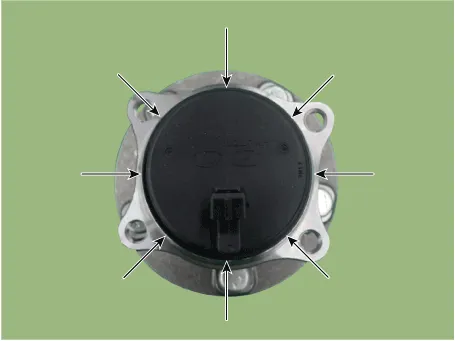
• When removing the sensor cap, remove it in a straight direction not to damage the tone wheel or encoder.
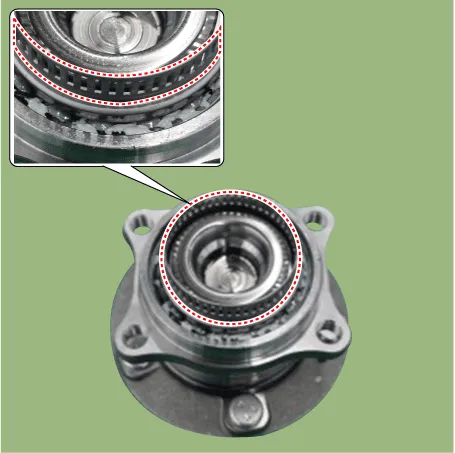
5.Check if distorted or damaged the tone wheel or encoder (A).


• Check if damaged the tone wheel or encoder after removing the sensor cap and replace the hub bearing if it was deformed.
• If the tone wheel is deformed, it may trigger the MIL ON or other problems.
6.Position the sensor cap to the same direction of sensor cap connector (A) as you checked before removing.


• Before installing the sensor cap, do not let any foreign material and contaminant into the hub bearing (A) assembly.
7.Install the sensor cap (A) with the special service tool (09527-2W110).
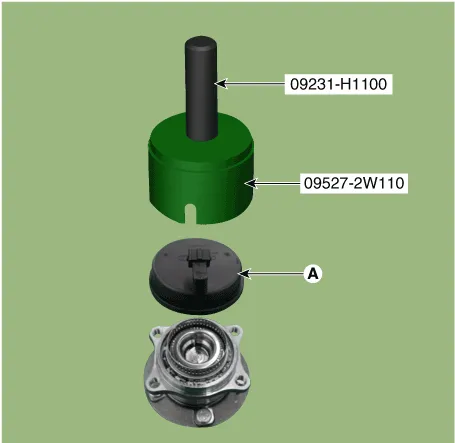

• Hammer until there is no gap between the SST and hub bearing assembly and install the sensor cap.
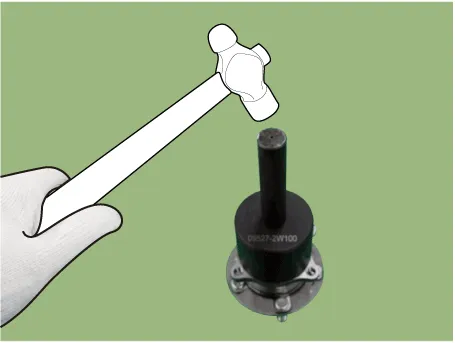
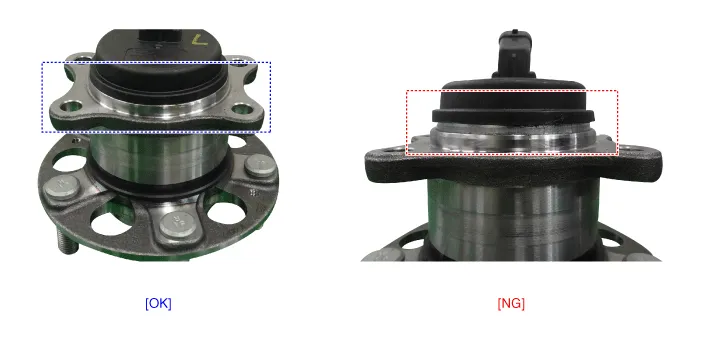
• Be careful not to tilt to one side when installing the sensor cap as it may damage the tone wheel or encoder.
• When sensor cap installation, hammering it until the gap disappeared between the sensor cap and hub bearing assembly.
8.Install the rear wheel hub bearing assembly.(Refer to Driveshaft and Axle - "Rear Hub - Carrier")
1.Measure the output voltage between the terminal of the wheel speed sensor and the body ground.

• In order to protect the wheel speed sensor, when measuring output voltage, a 100Ω resister must be used as shown.
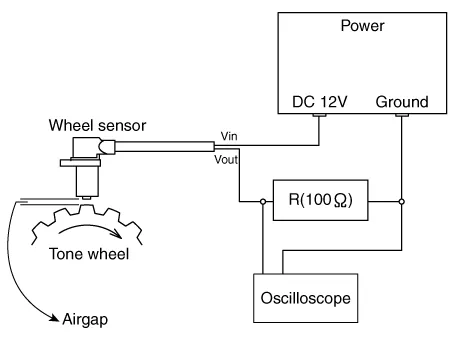
2.Compare the change of the output voltage of the wheel speed sensor to the normal change of the output voltage as shown below.
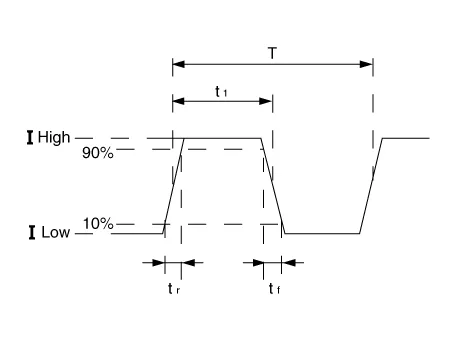
• â… low : 5.95 ~ 8.05 mA• â… HIgh : 11.9 ~ 16.1 mA• Frequency range : 0.03 ~ 3000 HZ
1.Install in the reverse order of removal.
 Front Wheel Speed Sensor
- Components
1. Front wheel speed sensor2. Front wheel speed sensor connector
- Removal
• Be careful not to damage the parts located under the vehicle
(floor under ...
 Downhill Brake Control Swtich
- Description
The DBC function is the acronym word of Downhill Brake Control
function. When a vehicle goes down the hill, just pushing the DBC switch
enables the car to keep its vehicle's speed ...
Other information:
Hyundai Tucson (NX4) 2022-2026 Service Manual: Accelerator Pedal
- Removal
1.Turn the ignition switch OFF and disconnect the battery (-) terminal.
2.Disconnect the accelerator position snesor connector (A).
3.Remove the upper mounting cap (B) and the loosen the mounting nut (C).
4.Remove the lower mounting cap (D) and the loosen the mounting bolt (E).Ti ...
Hyundai Tucson (NX4) 2022-2026 Owner's Manual: Limitations of Smart Cruise Control
Smart Cruise Control may not operate
normally or may operate unexpectedly if:
The sensor or the area near the sensor
is blocked, covered, or damaged.
The temperature near the front view
camera is very hot or cold.
The camera lens is covered or blocked
by windshield tint, the winds ...
