Hyundai Tucson: Seat Electrical / Air Ventilation Seat
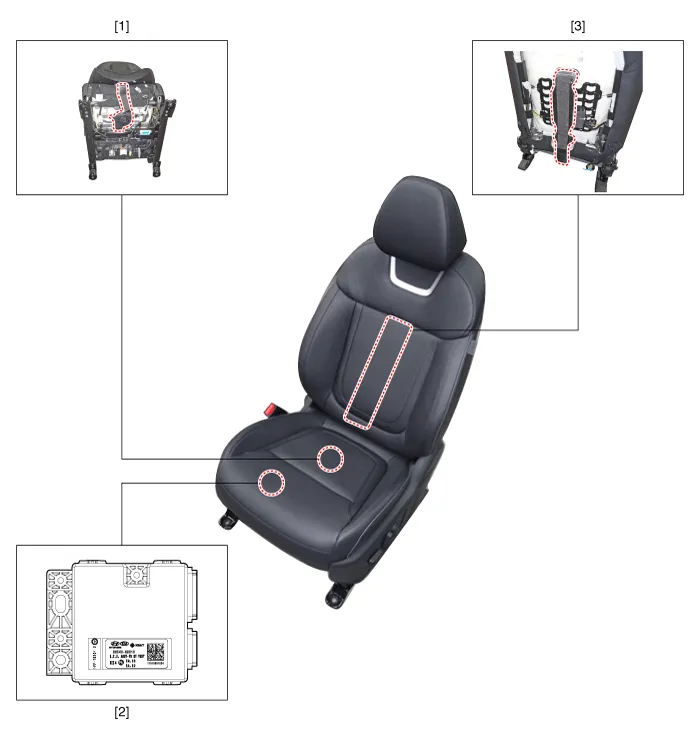
1. Air ventilation seat blower
2. Air ventilation seat control unit
3. Air ventilation seat duct
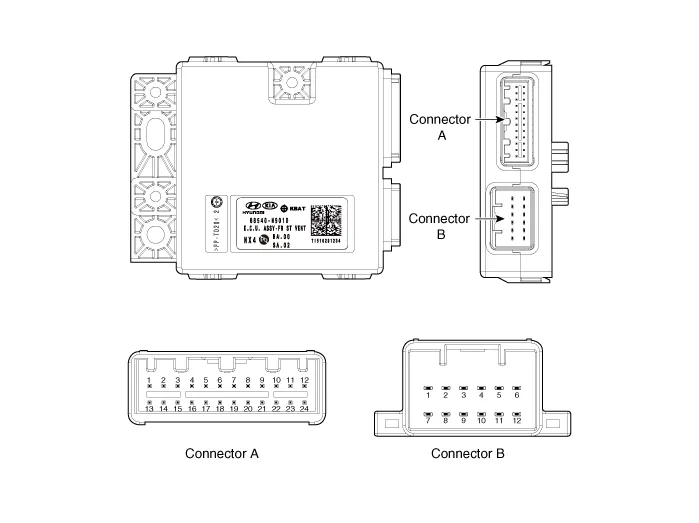
| Pin | Connector A | Connector B |
| 1 | IGN 1 | Ventilation heater battery (+) |
| 2 | Blower power_LH | Heater power_LH |
| 3 | Blower speed_LH | Heater power_RH |
| 4 | Blower RPM input_LH | - |
| 5 | - | Heater ground_LH |
| 6 | - | Ventilation heater ground |
| 7 | CAN LOW | Ventilation heater battery (+) |
| 8 | CAN HIGH | - |
| 9 | - | - |
| 10 | LIN | - |
| 11 | - | Heater ground_RH |
| 12 | Blower ground_LH | Ventilation heater ground |
| 13 | IGN 2 | |
| 14 | Blower power_RH | |
| 15 | Blower speed_RH | |
| 16 | Blower RPM input_RH | |
| 17 | - | |
| 18 | - | |
| 19 | ||
| 20 | NTC (+)_LH | |
| 21 | NTC (+)_RH | |
| 22 | NTC (-)_RH | |
| 23 | NTC (-)_LH | |
| 24 | Blower ground_RH |
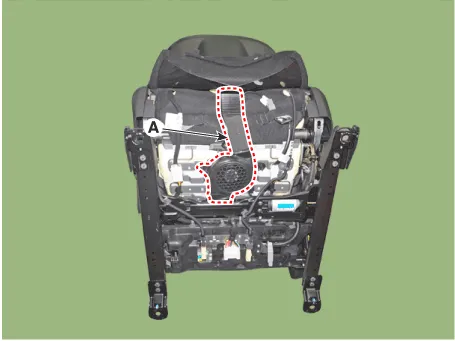
1.Remove the front seat assembly.(Refer to Body - "Front Seat Assembly")
2.Remove the cushion blower(A) after loosening the disconnecting the connector.
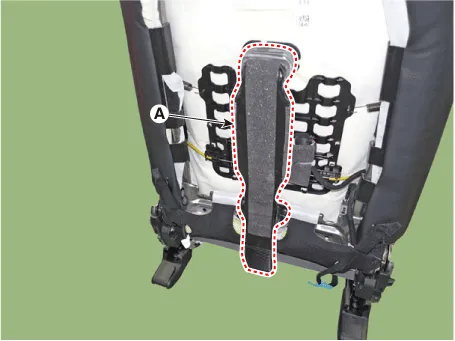
1.Remove the front seat back cover.(Refer to Body - "Front Seat Back Cover")
2.Remove the air duct (A) after loosening mounting screws.
1.Remove the front seat assembly.(Refer to Body - "Front Seat Assembly")
2.Remove the air ventilation unit (A) after loosening mounting screws.

3.Remove the air ventilation unit (A) after disconnecting unit connector.

1.Install the cushion blower.
2.Install the front seat assembly.
1.Install the air ventilation unit.
2.Install the front seat assembly.
1.Install the air duct.
2.Install the front seat back cover.
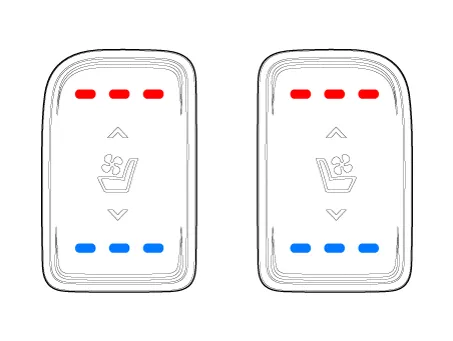
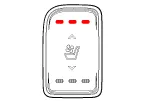
1.You can enter the diagnosis mode by turning the ventilation seat button on.
2.Enter the diagnostic mode referring to below description.
• In failure mode, press the ventilation seat button for 4 seconds and release it.
• Press the ventilation seat button for 2 seconds and release it.
• Lastly, press the ventilation seat button for 4 seconds and release it.
• When entering the failure mode, the LED of the ventilation seat button turns ON/OFF/blinks at each stage.
3.After entering the diagnosis mode, you can check what failed by checking the blinking LED.
| Failure indicator | Inspection items | Detailed inspections | |
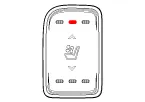
| [Seat heater LED] High : OFF Middle : FLASHING Low : OFF | NTC (Disconnector) | 1) NTC (disconnector) 2) Disconnection or missing connector of NTC |
| [Seat heater LED] High : OFF Middle : OFF Low : FLASHING | NTC (Short) | 1) NTC terminal short |
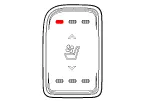
| [Seat heater LED] High : OFF Middle : FLASHING Low : FLASHING | Power disconnection of seat heating wire (Disconnector) | 1) Disconnection or missing connector of heating seat power line |
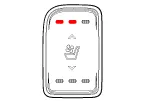
| [Seat heater LED] High : FLASHING Middle : FLASHING Low : FLASHING | Short circuit of seat heating wire power (Short) | 1) Short circuit of seat heating wire power (short) |
| [Ventilation seat LED] High : OFF Middle : FLASHING Low : FLASHING | Power disconnection of ventilation blower | 1) Disconnection or missing connector of ventilation power line 2) Disconnection or missing connector of ventilation signal line |
| [Ventilation seat LED] High : FLASHING Middle : FLASHING Low : FLASHING | Short circuit of ventilation blowerpower (short) | 1) Shor circuit of ventilation blower power (Short) |
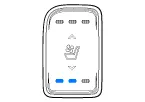
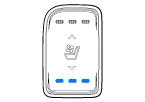
4.You can check the malfunctioning by checking the blinking LED.
5.The ventilating seat unit will record the malfunctioning that occurred.
6.If you press the seat heater button for more than five seconds, the LED for malfunctioning memory will blink four times and the recorded memory will be deleted.
7.Pressing the IGN OFF button will end the diagnosis mode for the ventilating seat.
8. You can check wheter the ventilating seat system works properly after turning the IGN ON. If you want to check the error code, you can refer to the procedure of 2 above.
 Seat Heater Switch
- Components
1. Front seat heater switch2. Rear seat heater switch
- Circuit Diagram
Connector Pin Information
PinDescriptionPinDescription
1IGN 117PDW switch
2ILL (+)18PDW IND
34W ...
 Lumber Support System
- Removal
1.Disconnect the negative (-) battery terminal.
2.Remove the front seat back cover.(Refer to Body - "Front Seat Back Cover")
3.Disconnect motor connecotor (A).
4.Remove the front s ...
Other information:
Hyundai Tucson (NX4) 2022-2025 Service Manual: Crash Pad Air Vent
- Component Location
1. Crash pad air vent [LH]2. Crash pad air vent [RH]
- Replacement
[LH]
• When removing with a flat-tip screwdriver or remover, wrap protective tape around the tools to prevent damage to components.
• Put on gloves to prevent hand injur ...
Hyundai Tucson (NX4) 2022-2025 Owner's Manual: Warning messages
Parking brake automatically engaged
When EPB is applied while Auto Hold
is activated, a warning sounds and a
message appears.
Press brake pedal to deactivate AUTO
HOLD
If you did not apply the brake pedal when
you release Auto Hold by pressing the
AUTO HOLD switch, a warning sounds ...
