Hyundai Tucson: Windshield Glass / Repair procedures

• Put on gloves to prevent hand injuries.

• Use seat covers to avoid damaging any surfaces.
1.Remove the front pillar trim.(Refer to Interior Trim - "Front Pillar Trim")
2.Remove the inside rear view mirror assembly.(Refer to Mirror - "Inside Rear View Mirror")
3.Remove the cowl top cover.(Refer to "Cowl Top Cover")
4.Remove the windshield glass side garnish (A).
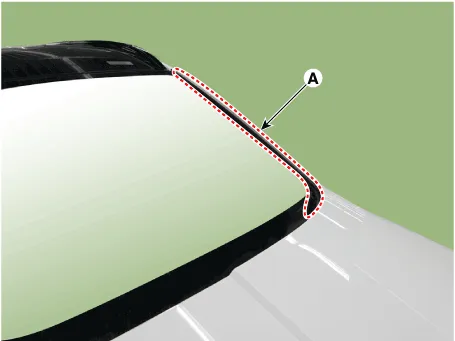
5.Using a cutter knife (A), carefully remove the windshield glass molding.

• Use the cutter with a 20 to 30 cm-long blade.
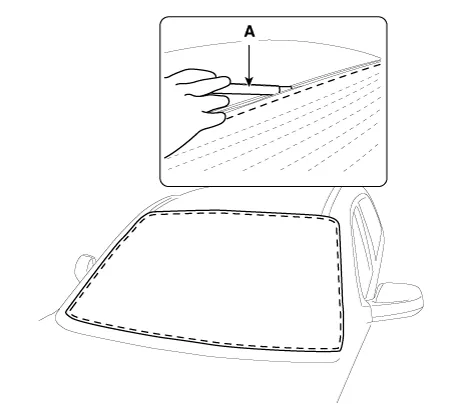
6.Cut off the sealant on the edge (B) while pulling the piano wire (A) to the left and right.

• Heat may occur when working on the wires.
• Be careful not to burn your hands.
• Be careful not to disconnect the piano wire.
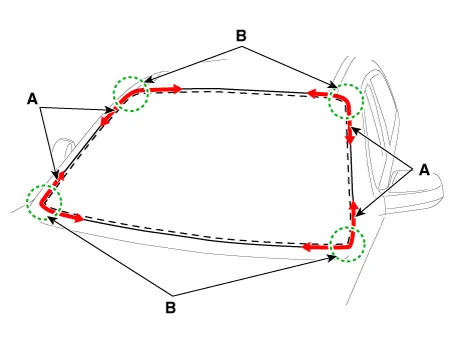
7.Put in a piano wire (A) through the corner of the windshield glass and insert wire grips into both ends of the wire.
8.Cut off the sealant on (A-A), (B-B), (C-C), while pulling a piano wire (A) to the left and right.

• Put on gloves to protect your hands.
• Heat may occur when working on the wires. Be careful not to burn your hands.
• Be careful not to disconnect the piano wire.

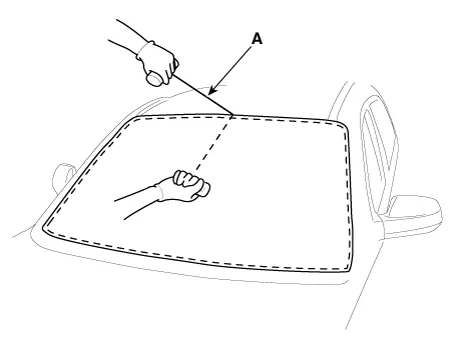
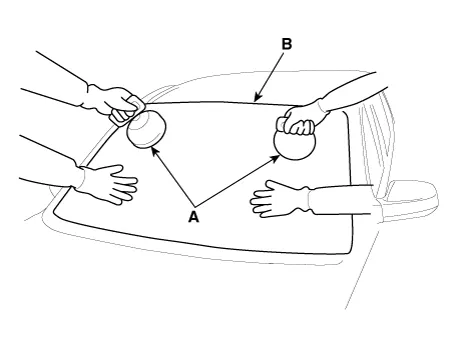
9.Remove the windshield glass (B) carefully using the glass holder (A).
1.Using a knife, scrape the remaining sealant around the body panel leaving about 2mm-thick sealant (0.0079 in.) on the bonding surface. If installing a new windshield glass, make alignment marks on the windshield glass and the body.

• Be careful not to damage the painted surface of the body.

• If the surface is damaged, apply paint or rust inhibitor for maintenance.
2.Clean the edges of body panel and windshield glass with alcohol. Apply glass primer to the edges of windshield glass and attach the molding onto the edges.
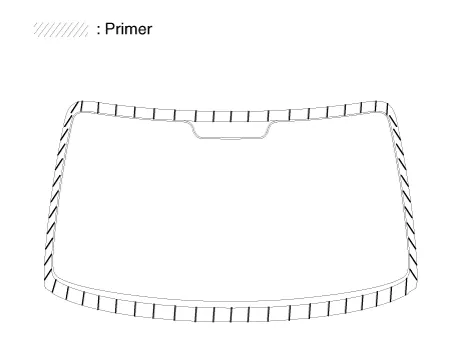
3.Apply the body primer to the bonding surface of body panel.

• Be careful not to touch the surface covered with the primer because touching it may lead to water leaks after installing the windshield glass.
• Do not apply the body primer to the glass.
• Remove any foreign materials from the primer-covered surface.
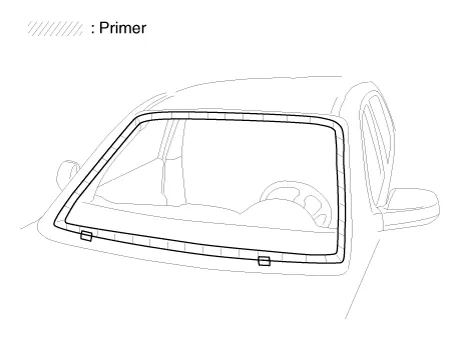
4.Apply the glass primer to the outer edge of windshield glass.

• Be careful not to touch the surface covered with the primer because touching it may lead to water leaks after installing the windshield glass.
• Do not apply the body primer to the glass.
• Remove any foreign materials from the primer-covered surface.
• Apply the sealant within 5 minutes of applying the primer.
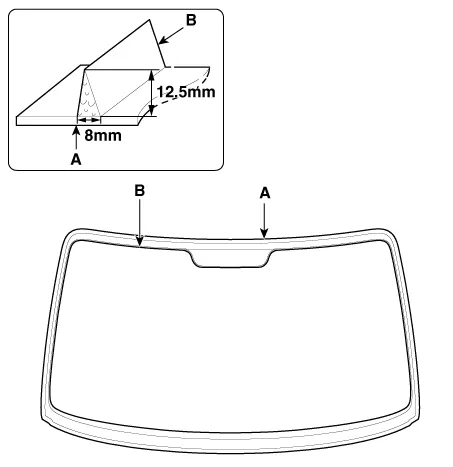
5.Apply a bead of sealant (B) around the windshield glass (A).
6.Using the glass holder (A), adjust the windshield glass (B) to fit the alignment marks (C) on the body and lightly push the windshield glass to make the edges fully seated on the bonding surface of body.

7.Install the windshield glass side garnish (A).

8.Install the cowl top cover.(Refer to "Cowl Top Cover")
9.Conduct a leak testing.

• Do not directly spray the high-pressure water to the joint area.
• If driving the car is inevitable, drive at a low speed for at least 8 hours.
• Advise the driver to avoid aggressive driving or driving on rough roads for 2-3 days after installing the windshield glass.
10.Install the inside rear view mirror assembly.(Refer to Mirror - "Inside Rear View Mirror")
11.Install the front pillar trim. (Refer to Interior Trim - "Front Pillar Trim")
 Components and Components Location
- Components
1. Windshield glass2, Windshield glass upper molding
...
 Liftgate Glass
...
Other information:
Hyundai Tucson (NX4) 2022-2026 Owner's Manual: Low fuel level warning light. Malfunction Indicator Lamp
(MIL)
Low fuel level warning light
This warning light illuminates:
When the fuel tank is nearly empty.
Refuel the vehicle as soon as possible.
NOTICE
Driving with the Low Fuel Level warning
light on or with the fuel level below "E"
or "- - -" displayed may cause the engine
to misfire and dama ...
Hyundai Tucson (NX4) 2022-2026 Service Manual: Special Service Tools
- Special Tools
Tool (Number and name)IllustrationUse
09977-3R000Clutch bolt remover
Removal and installation of clutch bolt
...
