Hyundai Tucson: Brake System / Master Cylinder
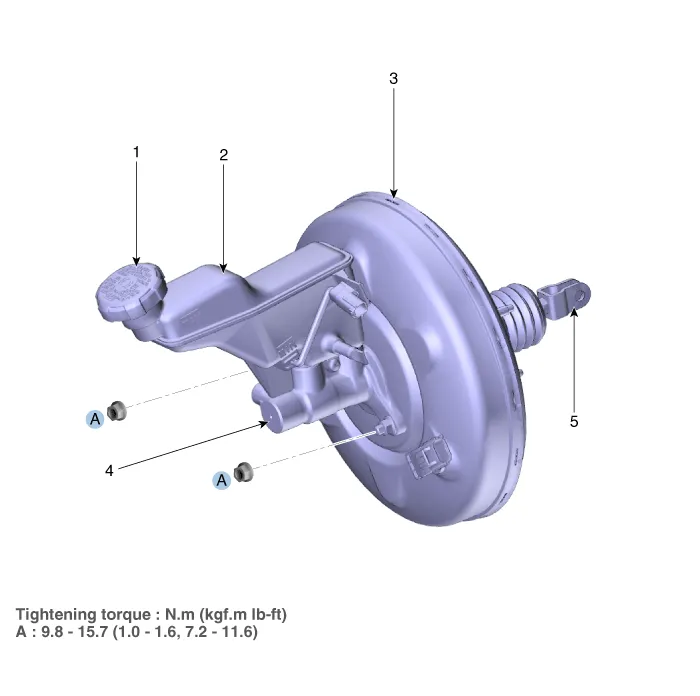
1. Reservoir cap
2. Reservoir
3. Brake booster
4. Master cylinder
5. Push rod
1.Turm ignition switch OFF and disconnect the negative (-) battery cable.
2.Remove the battery.(Refer to Engine Electrical System - "Battery")
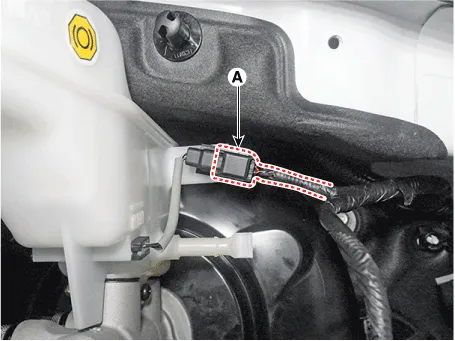
3.Disconnect the brake fluid level sensor connector (A).
4.Remove the brake fluid from the master cylinder reservoir with a syringe.

• Do not spill brake fluid on the vehicle, it may damage the paint; if brake fluid does contact the paint, wash it off immediately with water.
• Make sure no dirt or other foreign matter is allowed to contaminate the brake fluid.
5.Separate the brake tube (A) from the master cylinder after loosening the tube flare nut.
Tightening torque :18.6 - 22.6 N.m (1.9 - 2.3 kgf.m, 13.7 - 16.6 lb-ft)
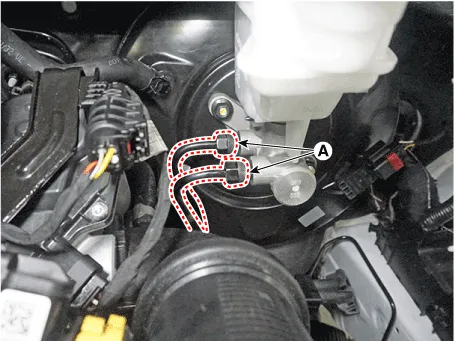

• Be careful of tap damage and nicks when removing the brake tube.
• Since oil leakage may occur during installation, assemble the flare nut accurately, paying attention to the location of the brake tube.
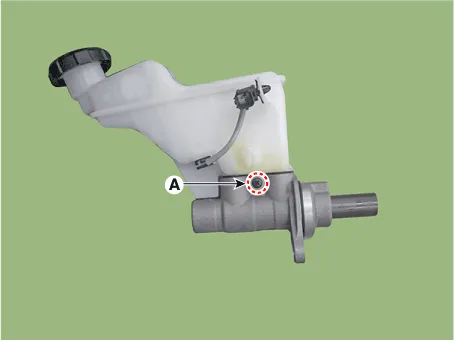
6.Remove the master cylinder (A) after loosening the master cylinder nuts.
Tightening torque :9.8 - 15.7 N.m (1.0 - 1.6 kgf.m, 7.2 - 11.6 lb-ft)

7.Separate the reservoir from the master cylinder after removing the screw (A).
1.Installation is the reverse of removal.

• Before installing the pin, apply the grease to the joint pin.
• Use a new snap pin whenever installing.
2.After installation, bleed the brake system.(Refer to Brake System - "Brake Bleeding Procedures")
3.Check the brake oil leakage and pedal operating condition.
 Brake Booster
- Components
1. Reservoir cap2. Reservoir3. Brake booster4. Master cylinder5. Push rod
- Brake Booster Operating Test
1.Run the engine for one or two minutes, and then stop it. If the
...
 Brake Line
- Components
- Removal
• Be careful not to damage the parts located under the vehicle
(floor under cover, fuel filter, fuel tank and canister) when raising
the veh ...
Other information:
Hyundai Tucson (NX4) 2022-2025 Owner's Manual: Engine oil pressure warning
light
This warning light illuminates:
When the engine oil pressure is low.
If the engine oil pressure is low:
Drive carefully to the nearest safe
location and stop your vehicle.
Turn the engine OFF and check the
engine oil level (For more information,
refer to the “Engine Oil” secti ...
Hyundai Tucson (NX4) 2022-2025 Service Manual: Repair procedures
- Alignment
Glass step alignment
1.Perform considerable step alignment after replacing movable glass (A).
①
②
③
2.Perfrom height adjustment releasing screw (A) a bit.
• Be careful not to damage screws.
3.Remove the decoration cover (A).
4.Tighten ...